
10 tips for great field photos
How to commemorate the quarry and the experience
By Tom Ryle/WDFW
The adage “a picture is worth a thousand words” is quite fitting when considering the pinnacle moment of a hunt when we kneel down beside a fallen game animal.
But few hunters are formally trained photographers. To many, the whole “photography thing” can be downright daunting. A host of variables that go along with photography equipment can paralyze the average hunter like a bad case of target panic.
Rest assured, taking quality field photos by yourself is easier than you might think. In this article I will suggest 10 tips that will enable you to capture your hunting successes with all the confidence of a well-executed bow shot.
Getting started
Properly presenting a harvested animal in a photo does take a bit of effort, but with some planning and the right equipment, anyone can take excellent photos suitable to share with fellow hunters and non-hunters alike.
Unfortunately, many hunters wait until a harvested animal is at rest in the bed of a pickup truck before taking pictures. These photos lack both respect for the animal and the emotion of the hunt. So the first step is a commitment to packing a camera with you each and every time you go afield, regardless of whether that means your smartphone camera or a dedicated digital camera. We all know that shot opportunities can be bestowed upon us when we least expect it, so it is essential to make sure your camera is with you and ready for duty at all times.
Whether you’re a flatlander hunting farmland whitetails or the adventuresome sort who enjoys the solitude and challenge of remote places, the equipment you’ll need is virtually the same:
- High-quality digital camera
- Tripod
- Memory card(s) as needed
- Batteries or a full charge on your cellphone
- Camera case if wielding a separate digital camera
- Hand pruners
- Folding saw
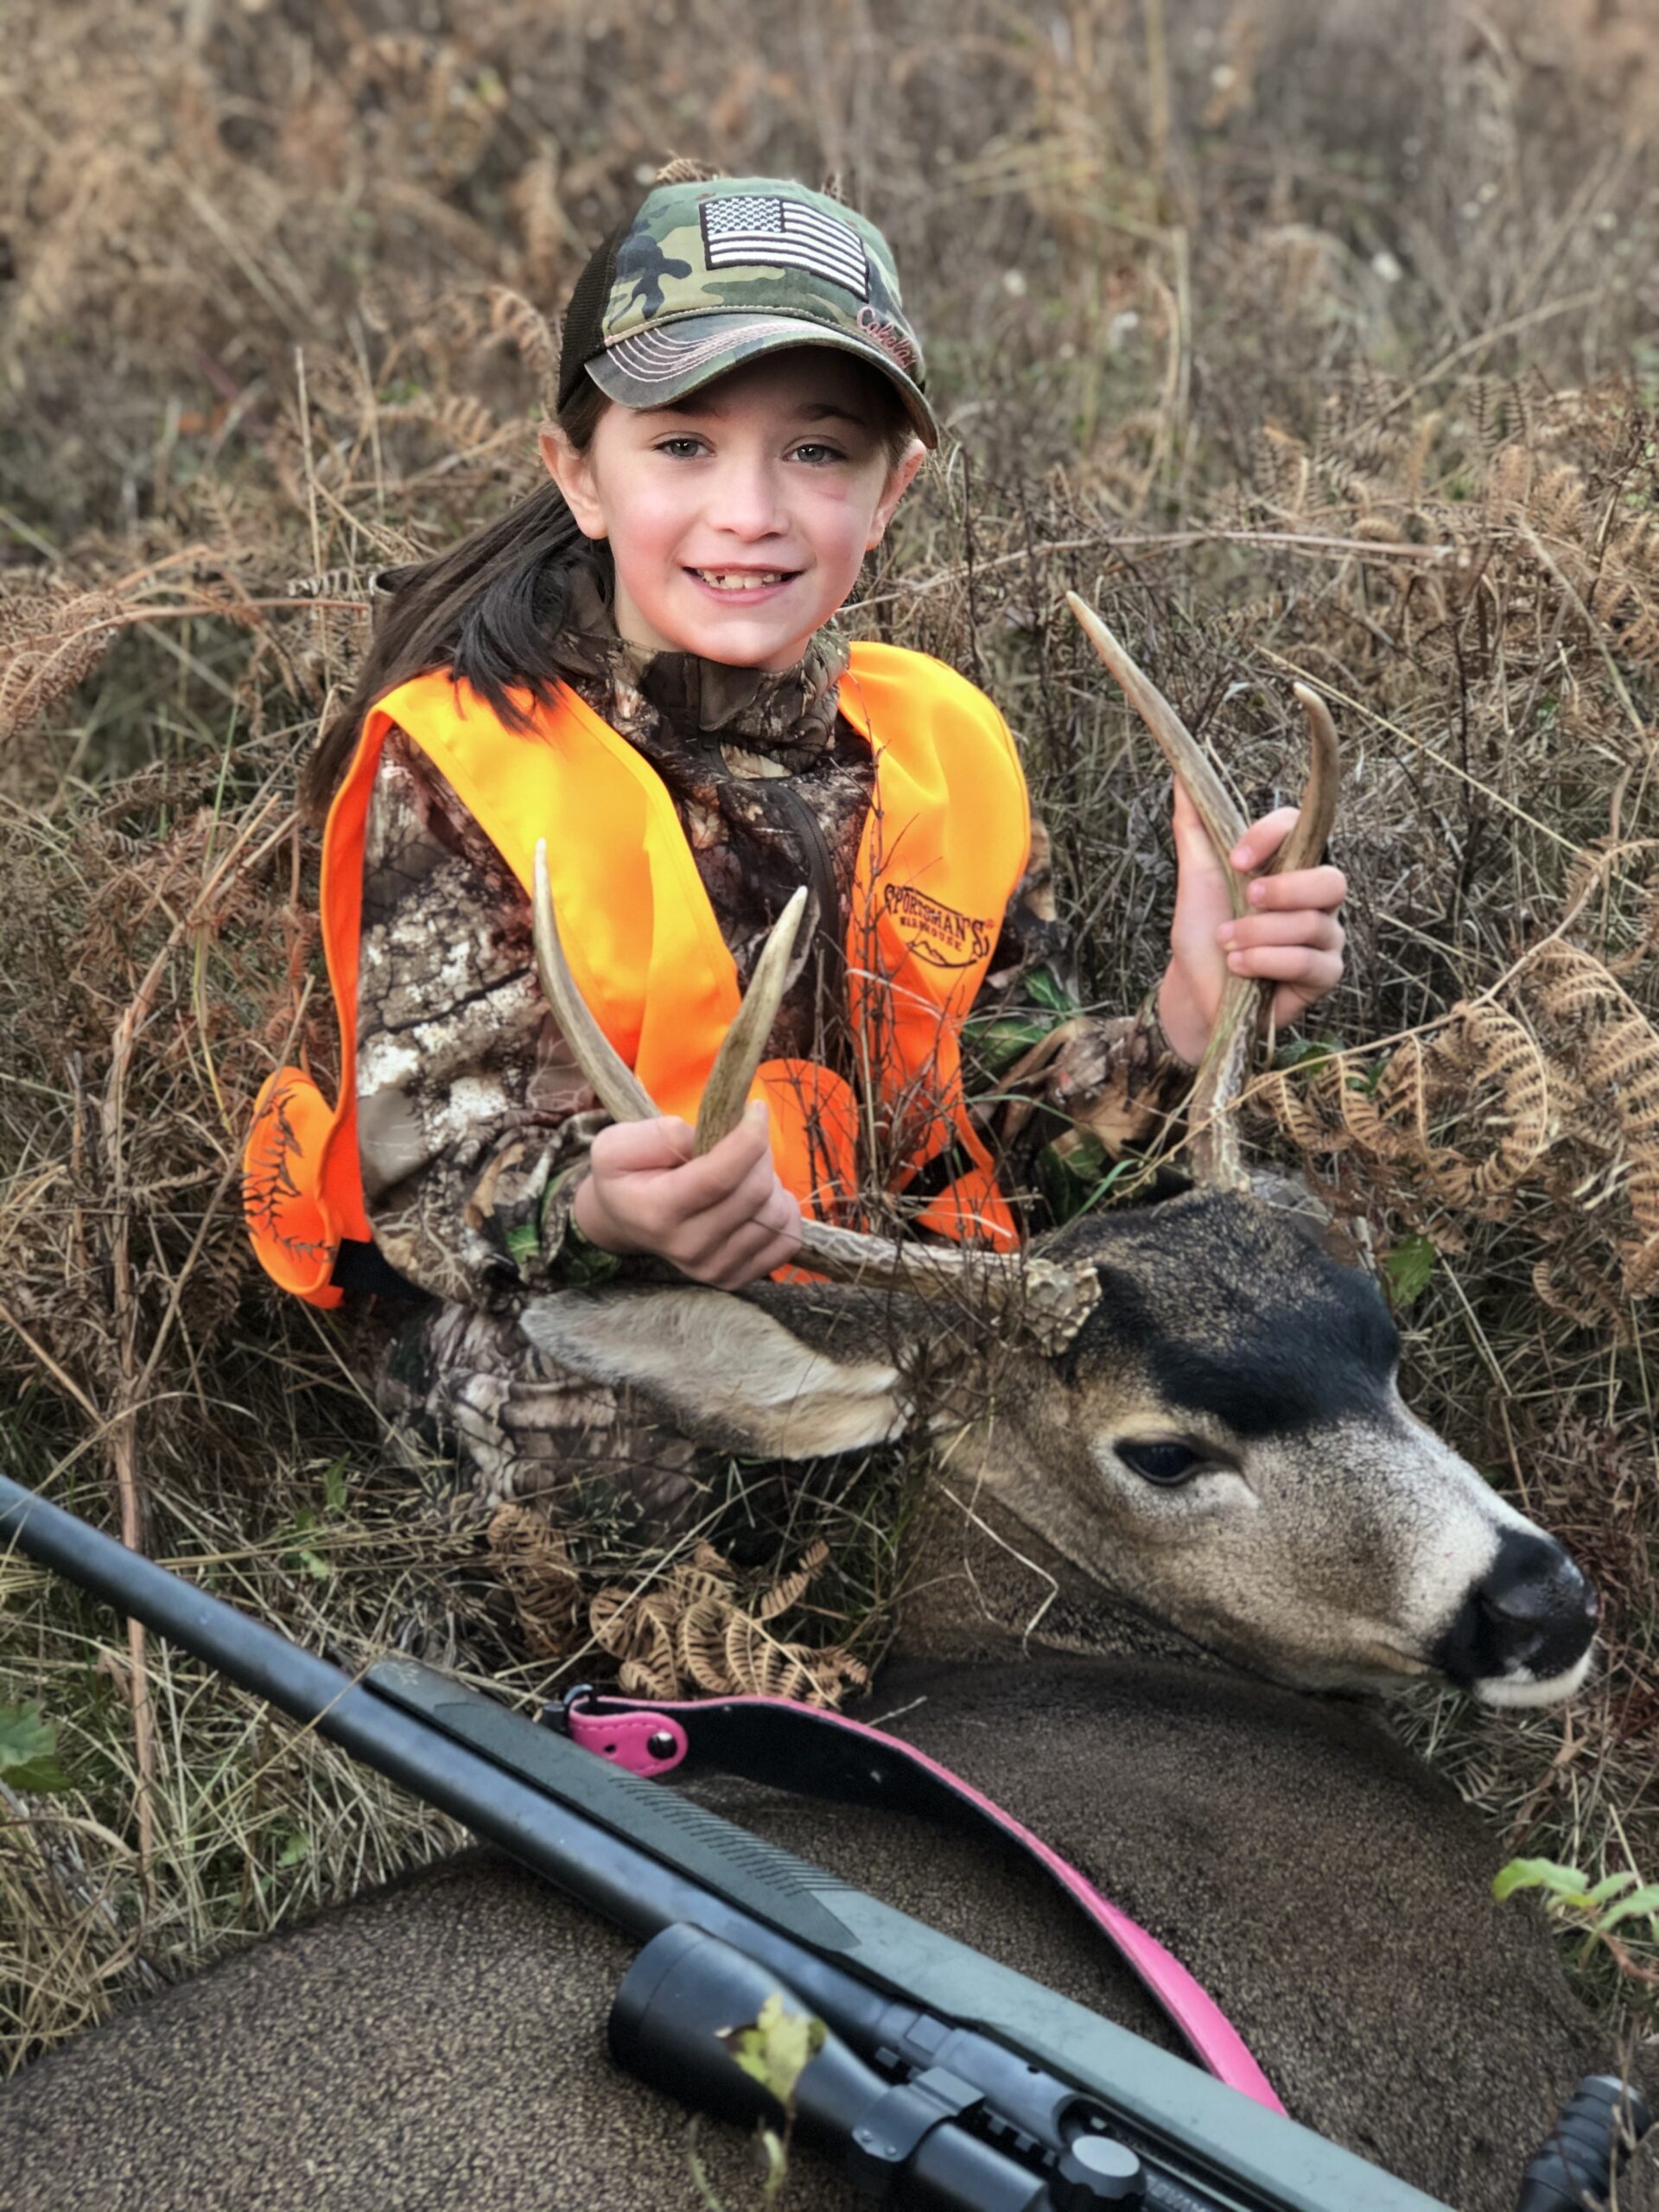
Rylee Schultz enjoyed success in 2020 during her first hunt. This photograph taken by her parents is well-composed, has excellent lighting, and crisp focus – three key photo attributes needed to preserve memories for a lifetime.
Choosing a camera
There are those who will disagree, but the capabilities of cellphone cameras have grown exponentially in recent years, leading to their use in a variety of situations that would have been scoffed at only a handful of years ago.
If a fellow outdoorsperson wants to show you their recent accomplishment these days, they often just take out their smartphone and start scrolling back in their photo gallery.
The advantage to relying on your cellphone camera in the field of course is the scant weight and size for what the equipment can do. And a smartphone sure makes sharing your photos with friends much easier.
Are you sacrificing photo quality by going with the streamlined tool? Perhaps, but it really depends on your phone camera’s capabilities. In many cases, if you’re staging a harvest photo, your smartphone will serve you well.
One drawback to the smartphone is that if you’re spending a lot of time in the field for your hunt with no chance to charge your battery, that camera could fail you at the worst time.
If you’re debating about whether smartphone or digital camera is the way to go, try your phone camera out in the field under similar conditions to a harvest photo and see if you like the result. Looks good? Look no further. Not quite right? Time to upgrade.
Now if you decide to go the dedicated digital camera route, there are two general categories of cameras: digital single lens reflex (DSLR) and the compact point-and-shoot variety. DSLR’s are larger, more sophisticated, and employ interchangeable lenses. Point-and-shoot models are compact all-in-one cameras that provide the average user an excellent set of features suitable for many situations.
For our purposes, the digital point-and-shoot unit is an excellent choice due to its compact size, features, and ease of use. There are many high-quality makes and models to choose from in a variety of price ranges. There isn’t space here to elaborate, so I recommend you visit with a local camera dealer or a friend who can provide you a personalized recommendation.
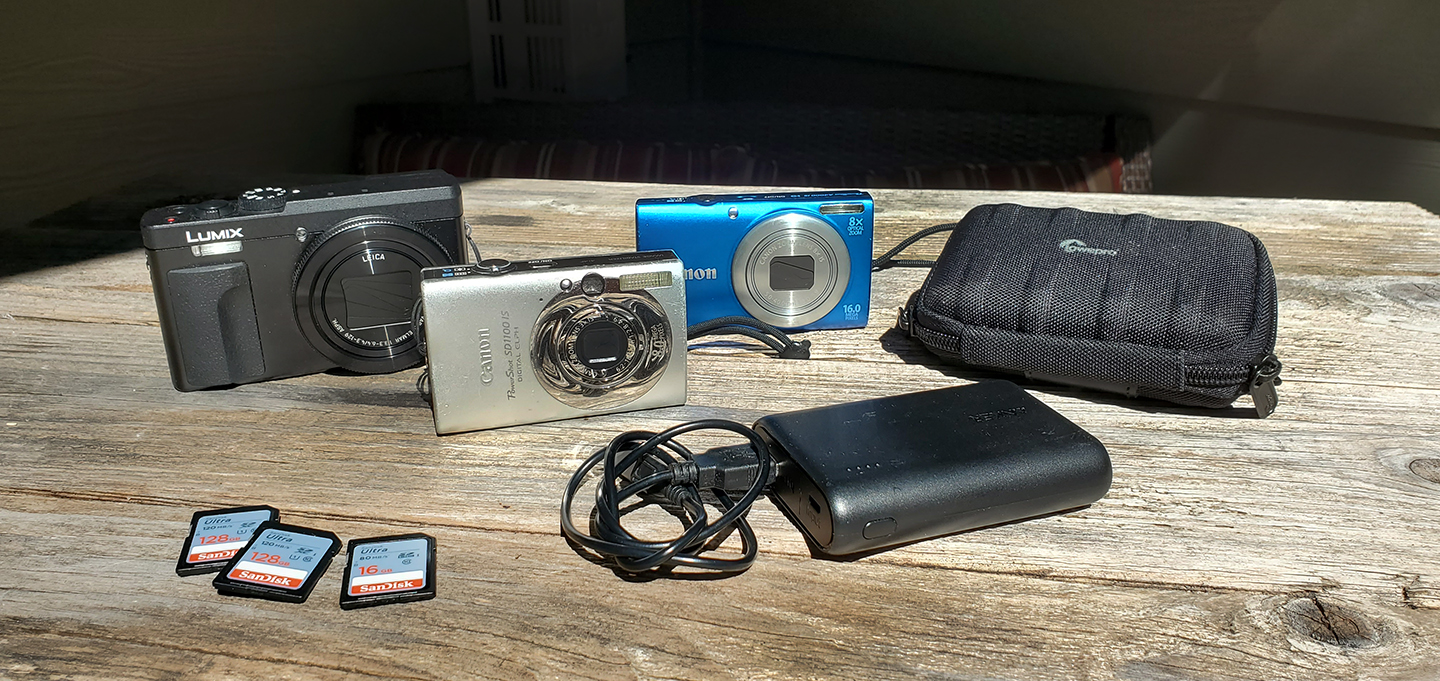
Digital point and shoot cameras have proven to be excellent for most field photo applications. They are compact and packed with features. Be sure to pack plenty of memory cards. If your cellphone is your preference, then you might invest in a battery pack (foreground) to keep your phone fully charged on extended hunts. (Tom Ryle/WDFW)
Now for those tips
Tip 1: Plan ahead
Make sure you have fresh batteries and enough memory for your digital camera. If relying on your cellphone, keep the charge topped off in your vehicle until you get where you’re going. It’s also helpful to keep your phone on airplane mode while in remote country so your battery doesn’t drain as the phone searches for signal.
Buy a compact soft-case to protect your digital camera from the daily ride in your pack. Most cases have pockets for an extra battery and memory cards, which helps keep everything together. A gallon-sized freezer bag will provide additional moisture protection.
Pack several paper towels to clean up any visible blood on your harvest. Pick up a small, lightweight tripod and practice with your camera’s self-timer feature. Many digital cameras and smartphone cameras allow you to choose the time delay and provide you ample time to get ready.
Tip 2: Prepare the kill site
No matter where you hunt, there will likely be some site preparation needed before you can capture high-quality field photos.
Here in the Pacific Northwest, many hunters carry hand-pruners to aid in navigating the dense vegetation. They are also an invaluable tool for preparing a kill site for photos. Use them to quickly snip limbs, brush, grass, and weeds. A small folding saw will make short work out of larger limbs.
Look for those long strands of dry grass between your camera and your quarry. They are distracting, especially when lit up with a flash after dark. Also be aware of blood on the ground or vegetation as this will show up in photos.
Tip 3: Consider the lighting
Before you begin shooting photos, you need to size up the situation and set up for the best lighting. For deer-sized game, you can usually turn the animal facing the sun. For larger, heavier game, such as moose and elk, you might not have that option. Use your clippers or saw to open up the area as best you can, taking note of the sun’s position.
An overcast day provides excellent lighting by evenly diffusing sunlight. Bright sun overhead or behind will cast dark shadows, especially under hat brims. Using your flash will help reduce the dark hat shadow hiding your smiling face. If you can, position your photo to be facing or slightly quartering into the sun for best results.
Night shots can be a bit tricky. Most point-and-shoot digital cameras have great auto focus and auto light metering features that are typically part of the “Auto” mode. Metering off the head of the animal will provide good focus and appropriate depth of field. Most cameras have a red-eye reduction feature that is useful for night shooting as well, and many smartphones feature a red-eye reduction photo editing feature for after the shot. Practicing with your equipment in these conditions when the opportunity presents itself will help.
Tip 4: Composition — capturing the essence
A well-composed success photo will have all the elements of a good story. The subject matter will be prominent and in crisp focus. Key supporting elements, such as a hunting bow, will be casually included and carefully placed not to distract from the primary subject. Creating this balanced visual collage of person, beast, and tools is called composition, and it is key to producing great field photos.
The rule of thirds is the general principle that your subject matter should reside within one of the four intersections of a tic-tac-toe grid overlaid on your photo. Some camera’s viewfinders have this feature built in like the crosshairs of a rifle scope. Another trick when composing your shots is to consider leading lines or natural elements in the frame that leads the eye to the main subject. These can be subtle elements such as a treeline or skyline.
The long legs of the deer family can clutter the foreground of a photo, so it’s best to tuck them back away from the camera lens. Some folks like to tuck the animal’s legs underneath in an “African pose” to create a more regal presentation.
Composing photos with antlers or horns against a clear sky or sunset backdrop create stunning visual interest. Remember to keep the antlers from obstructing your face. You might try this if the conditions are right on your next hunt.
It bears repeating, watch for those pesky blades of grass and twigs that always seems to plague success photos. Ensure you have a clear path from lens to subject.
Tip 5: Capture the emotion!
Each year, we hunters put forth substantial energy obsessing about the forthcoming hunt. Countless hours tick by as we research new hunting grounds, apply for special permits, and fret over our gear with excited anticipation. We juggle priorities and commitments, and we’ll drive all night to get a jump on the rising sun. Yes, hunting is a passion of the heart and soul. Yet I find it ironic that with each passing season I see many field photos depicting hunters with droopy, glum faces. Some folks even look mad. Be aware — the expression on your face is telling a story. It’s good to show some excitement or look down at the animal with respect and admiration.
Tip 6: Show respect
It’s not uncommon to thumb through an old timer’s hunting album to find the hunter straddling game or standing next to a field dressed buck in the bed of a pickup. They are nostalgic for sure, and for many, they are prized family heirlooms. But today we have many strong social and political forces at play — forces that would have you out of the woods and hunting banned if they had their way. We need to be cognizant of the image we portray, including our success photos.
Here are a few ways you can show respect for your quarry with your success photos:
- Do not sit on the animal. Instead, kneel beside or behind.
- Do your best to wipe or rinse off excess blood and/or compose your shot to crop out unsightly blood. Remember that a flash will light up blood on ground cover and vegetation, so do your best to reduce the amount of visible blood in your photos. One trick is to shoot black and white photos to virtually eliminate blood from your photos. This can be particularly handy for mountain goats or Dall’s sheep with their white hides.
- Often the tongue will be hanging out of the animal’s mouth. You can simply tuck it back inside.
Tip 7: Take both horizontal and vertical photos
All too often people seem to forget that you can turn your camera 90 degrees to achieve vertical compositions. Some situations are much better suited for a vertical orientation so look at the shot both ways. Experiment and leverage the freedom of digital photography. You can view your photos instantly on the screen and delete any that don’t have promise.
Tip 8: A tripod is required
Many hunters are quick to pack a camera but fail to pack a tripod. You know who you are — balancing cameras on rocks, logs, your pack, and anything else that might work. Today there are a variety of great tripods available for every budget that are perfect for the weight- and space-conscious hunter. Tripods with ball-and-socket designs or other arrangements with flexible legs allow you to position your camera just about anywhere, even on tree limbs or a clump of brush.
Tip 9: Environmental considerations
Most of the technical gear we use is designed for the onslaught of abuse we impose on it. Most consumer-grade digital cameras were not, however. They must be kept dry and free from dirt and dust in order to function properly. I have found that by keeping my cameras in semi-hard shelled zippered cases, they ride safely in my pack day in, day out. For an added dust/moisture barrier I often put the case inside a one-gallon freezer bag.
That said, there are digital cameras that have been designed to put up with a lot more abuse than their counterparts, and the same goes for smartphones, so shop around if you want to get a tool tailored to the job.
When it comes to smartphones, there are also a variety of protectors that will allow your phone to be treated more ruggedly than designed, as well as waterproof holders that still allow the use of the touchscreen while protecting the device.
Tip 10: Keep shooting!
Don’t hold back — it can take a lot of outtake shots to get to that perfect photo. I will take a lot of photos that I know will turn out well, and then a bunch of experimental shots just to have fun with the process and learn about additional camera features.
For some folks an annual hunting outing is a leisurely affair with friends and family; a tradition that forges relationships over generations. For others it’s the personal test of endurance, stamina, and mental toughness that comes from a backcountry bivouac hunt. Regardless of our personal motives and aspirations, one key element remains constant — the hunt is meaningful. So it makes good sense to capture this goodness as a means to relive, share, and reflect. I hope you’ll try these photography tips on your next hunt and enjoy the memories for years to come.
Bonus tip!
Another great way to capture unique moments is to shoot some video clips with your cellphone of the pack out, etc. After the hunt in the comforts of home you can review the footage and take screenshots from the video. Everything is more natural and candid when memories are captured real-time, so this approach allows you to cherry pick those gems from your video.
Most cellphones have a feature that allows you to tap an on-screen icon to capture a screenshot during video playback. You can also slide the playback control manually to the exact video frame you’re after.
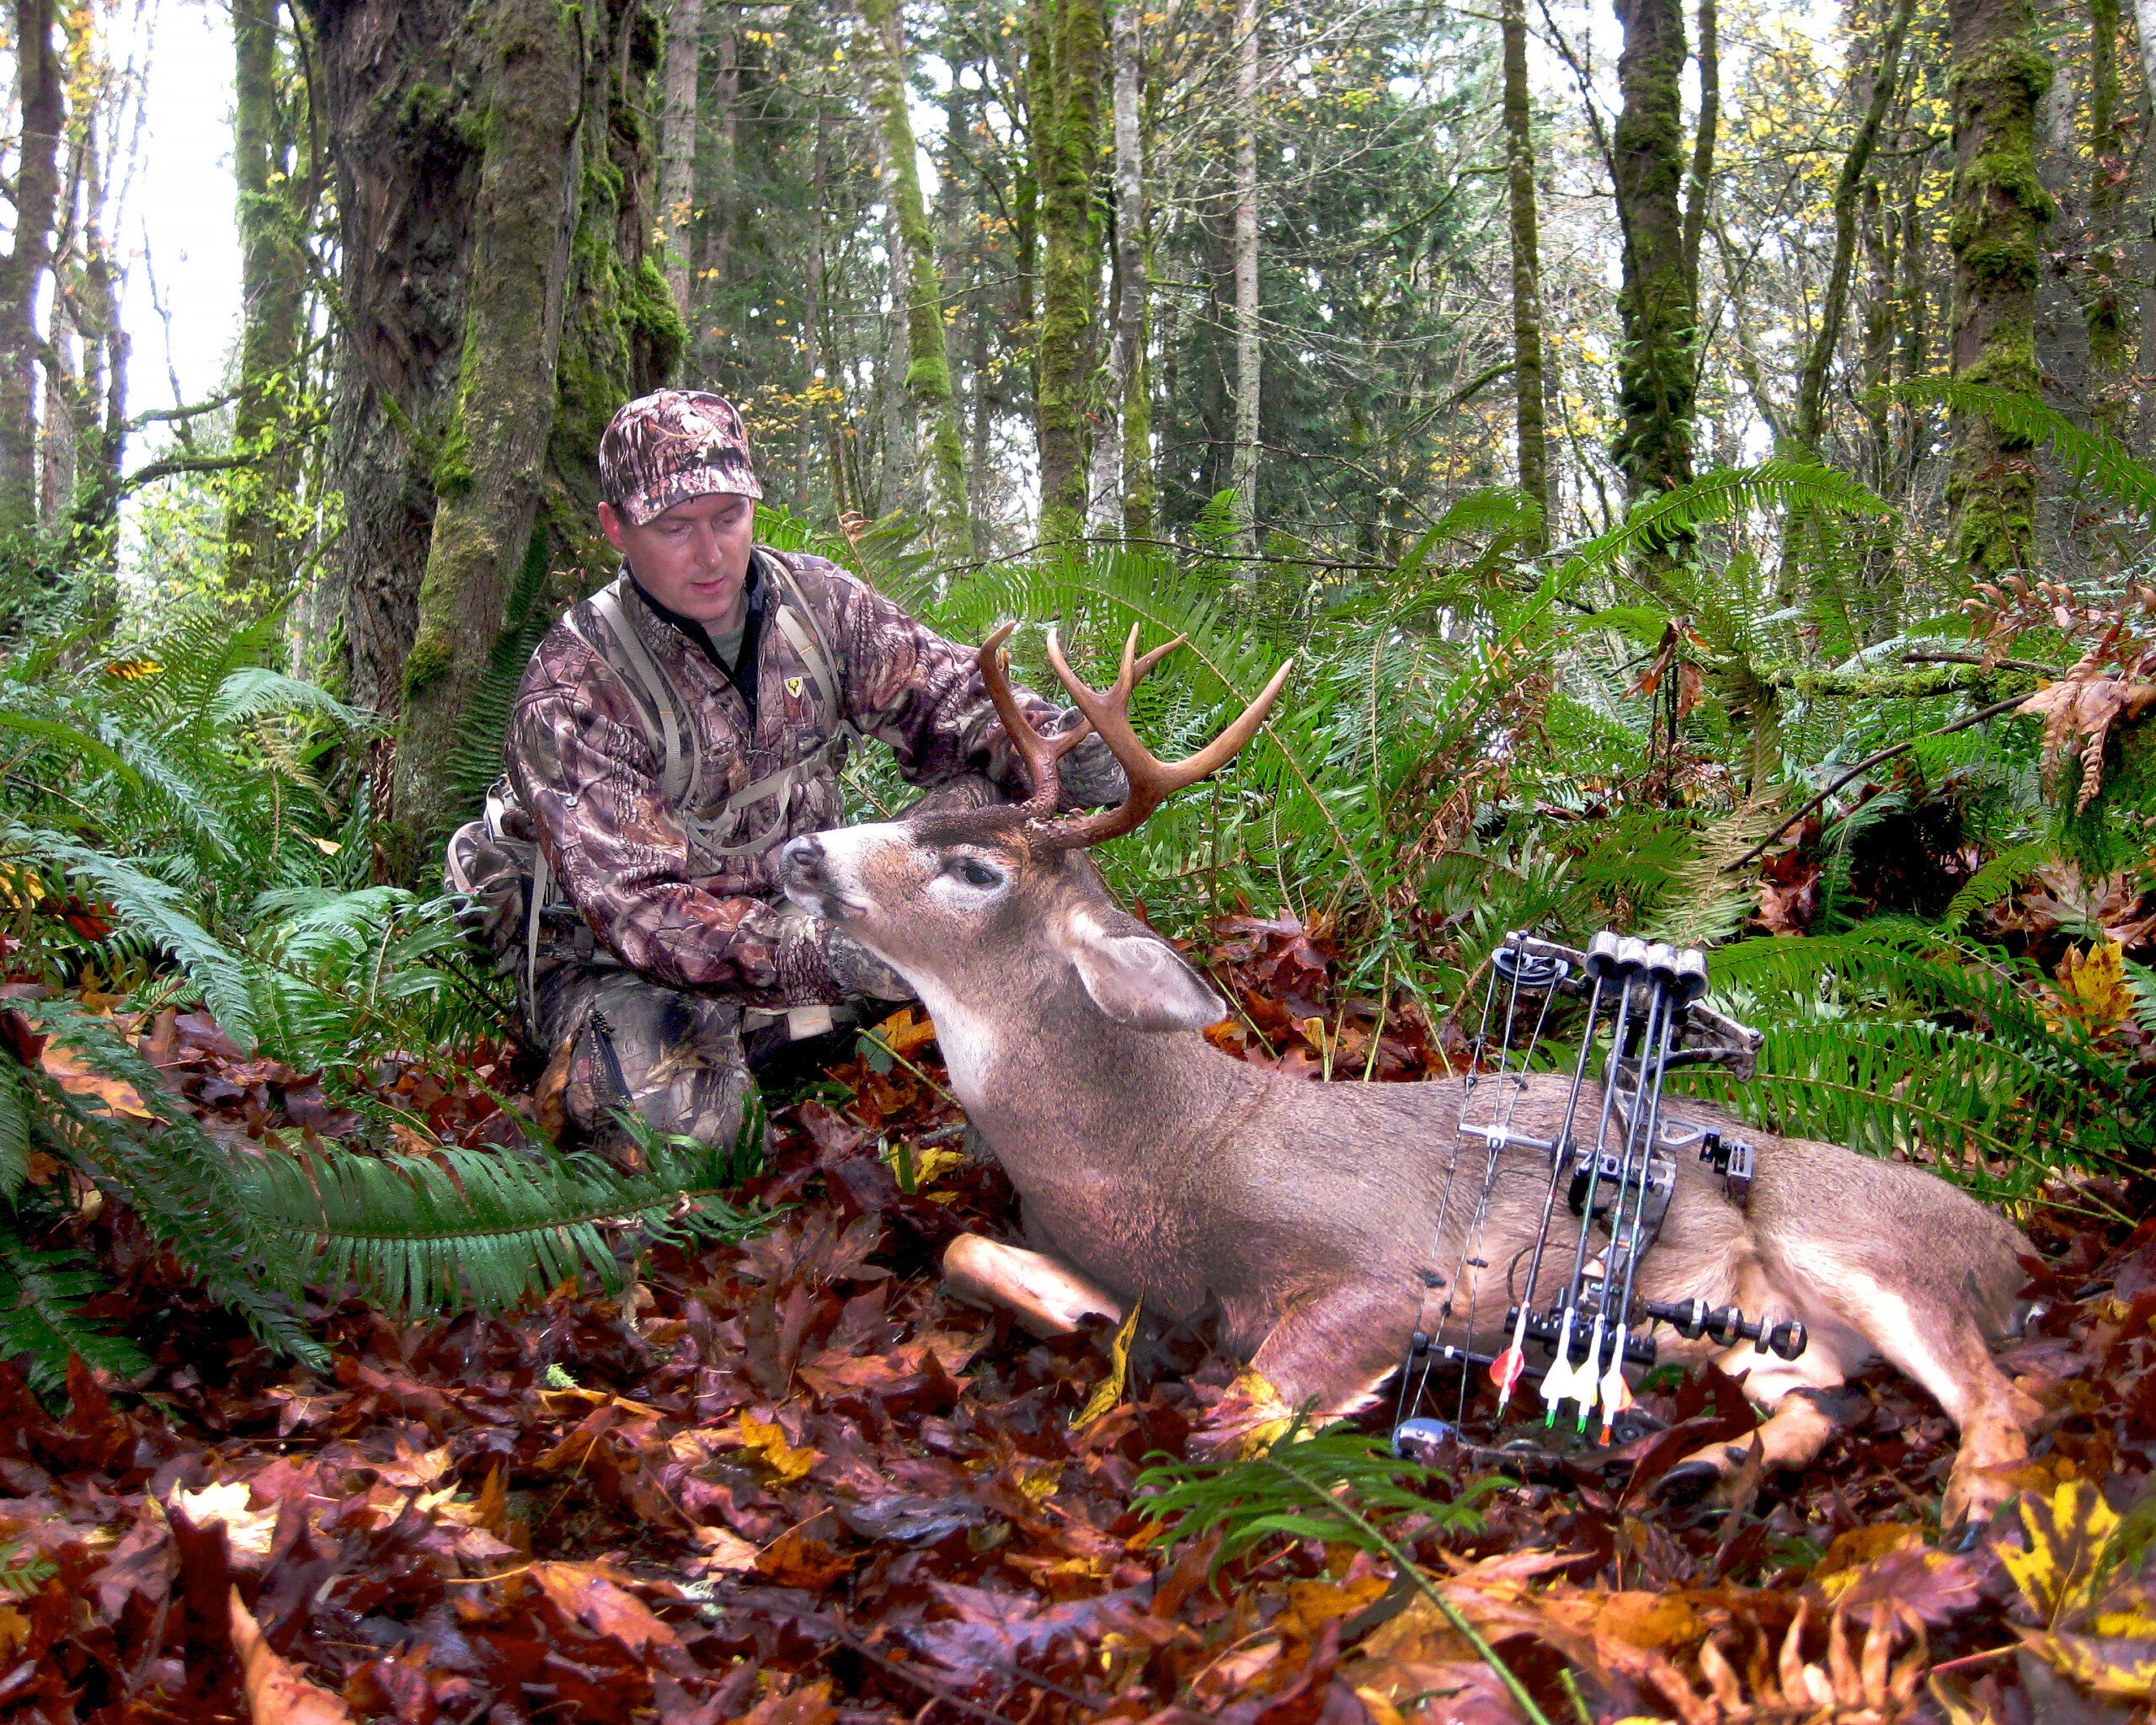
The author harvested this blacktail buck in a mixed forest habitat with dense sword fern cover. Before any photos could be taken, a fair amount of trimming was needed to create enough working space free of obstructions. (Tom Ryle/WDFW)
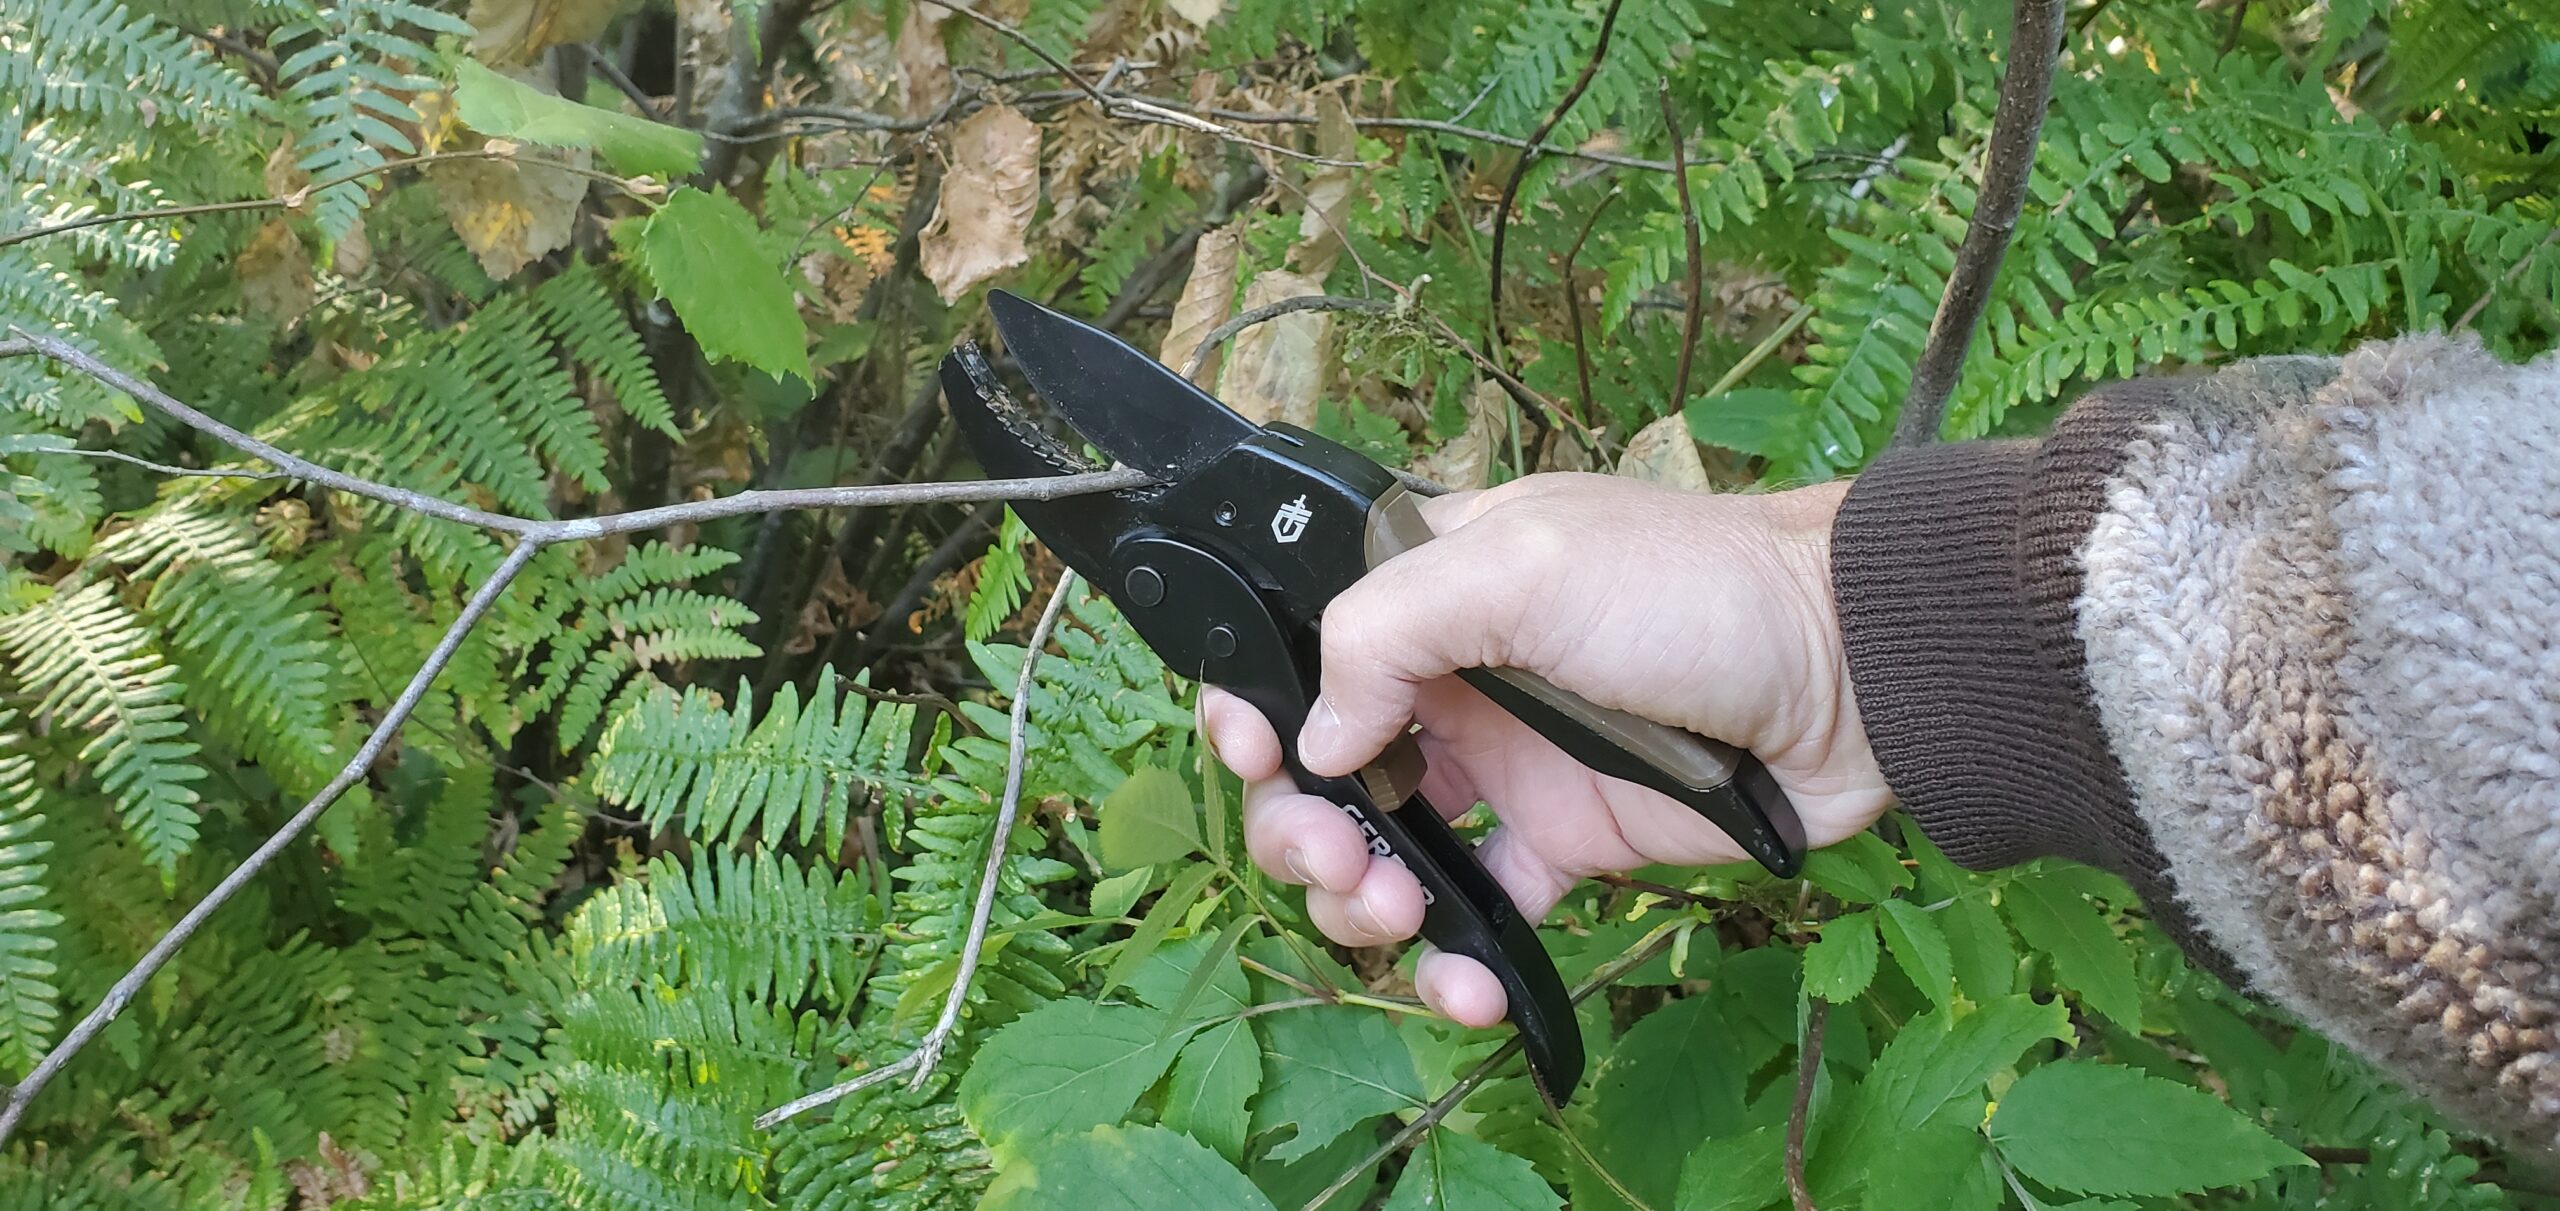
Be sure to take some time to remove dry blades of grass, twigs and limbs that may encroach on your composition. All too often an overlooked tuft of grass or small limb can clutter or detract from your photos. (Tom Ryle/WDFW)
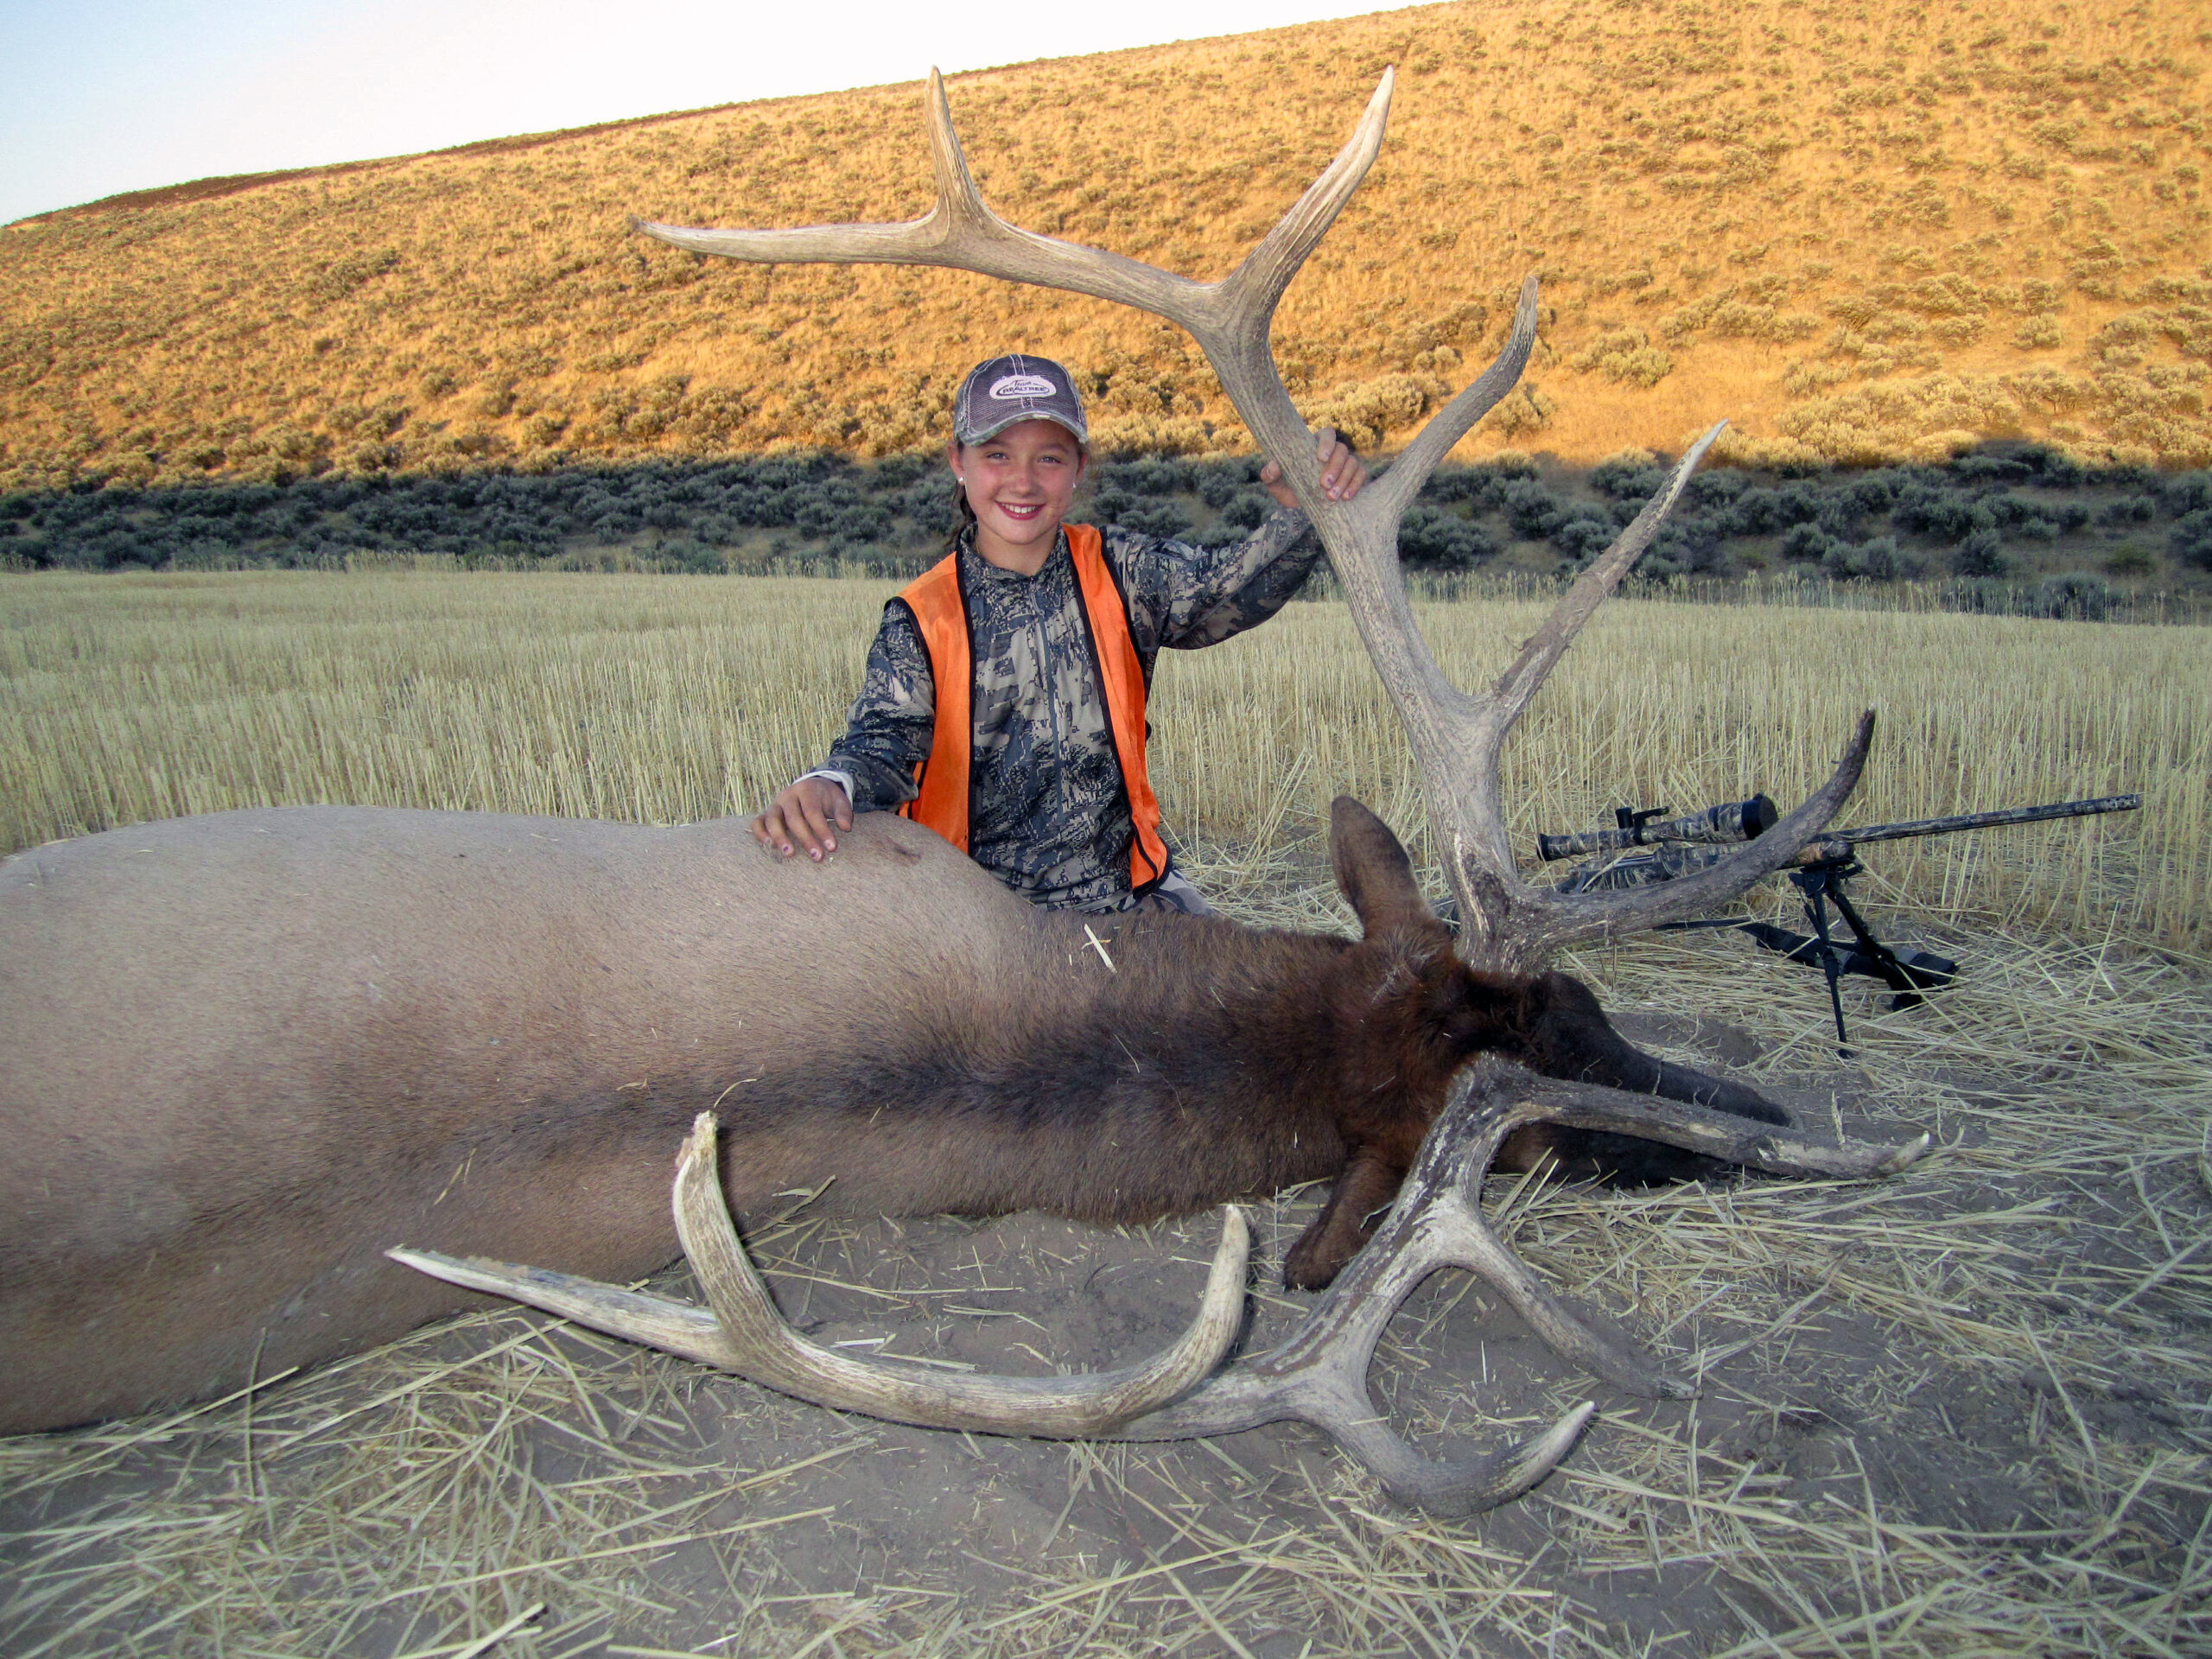
In this creative composition, the photographer frames the young hunter within the sweeping antler beams of this large bull elk. The even early morning lighting minimizes shadows on her face often caused by brimmed hats. Note that the rifle muzzle is pointed out of frame safely away from the hunter, and she is also wearing an orange vest. (Sydnee Hooker)
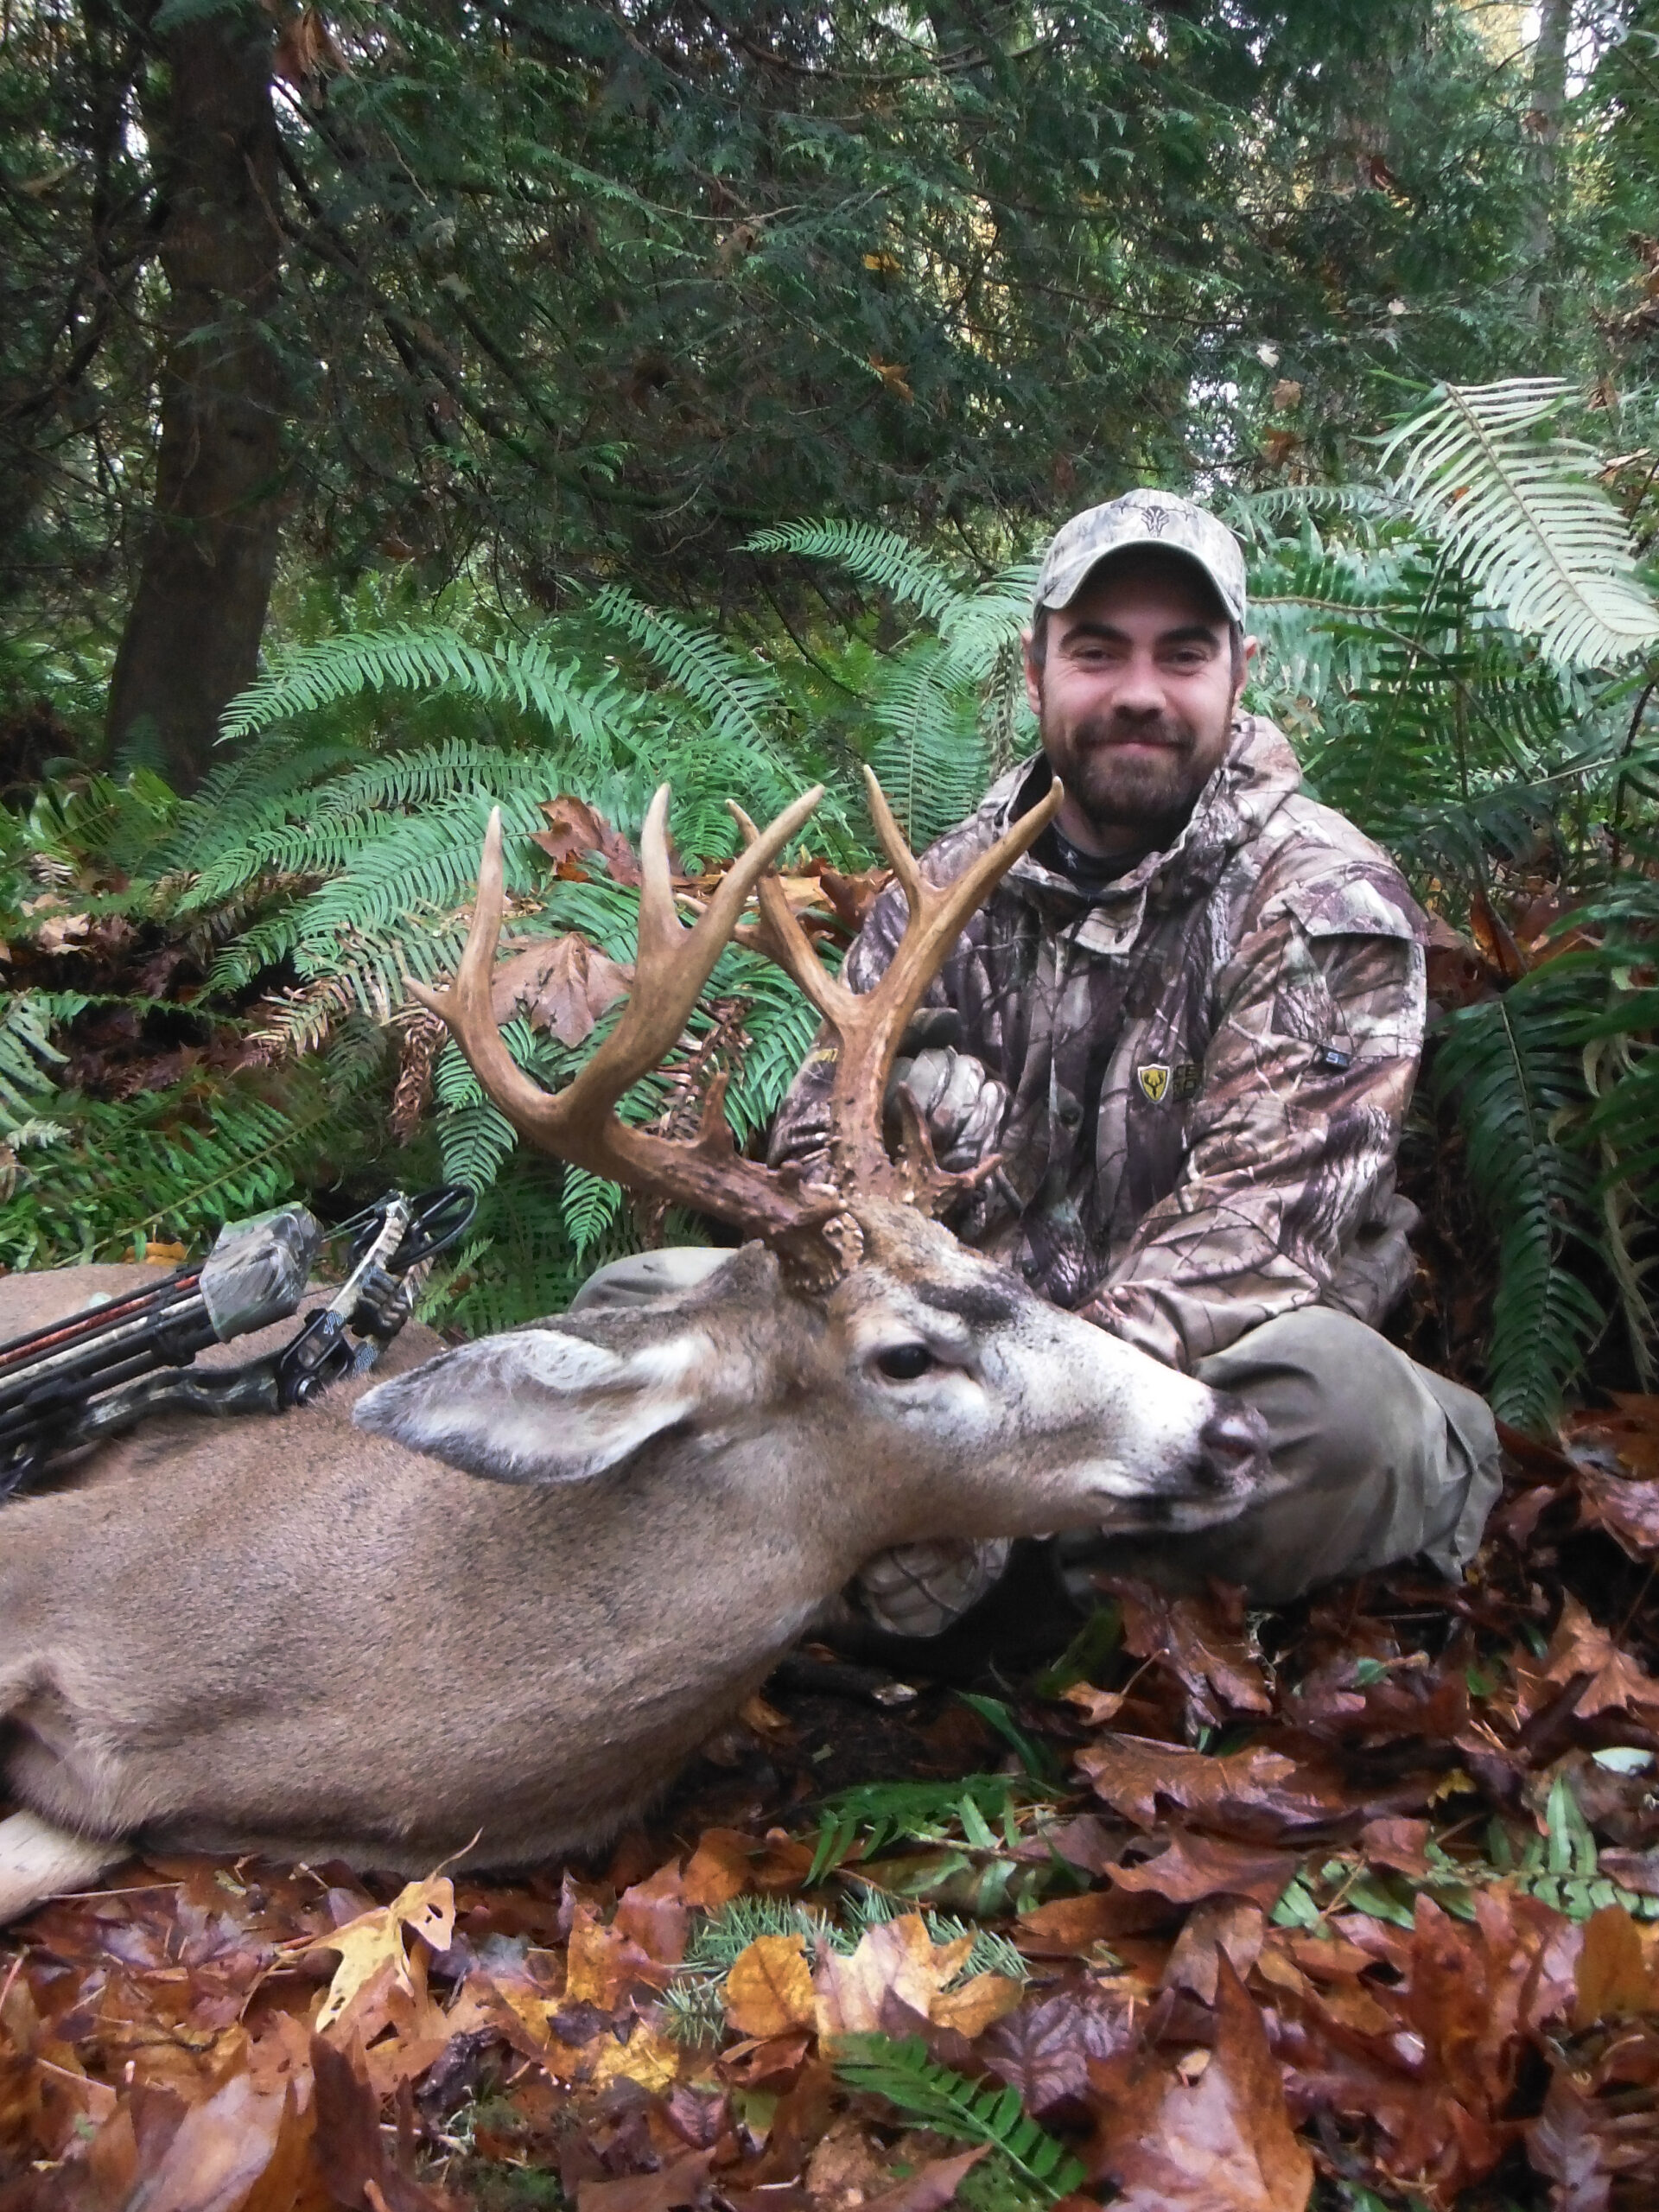
This hunter is all smiles after arrowing this mature blacktail buck. The composition focuses on this old buck’s unique antlers and gray face. There is no visible blood and the buck’s head is held in a natural, respectful pose. The hunter’s bow is intentionally visible, yet it remains secondary information. (Tom Ryle/WDFW)
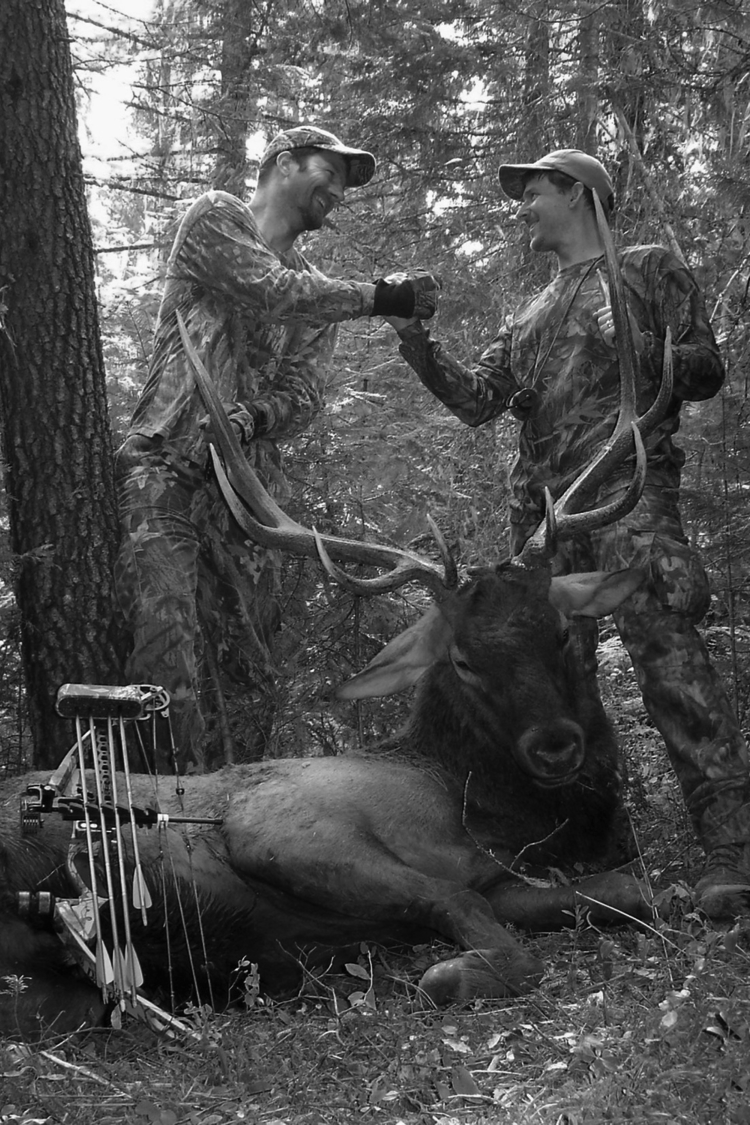
These two hunters celebrate a successful September call-in on a mature bull elk. By creating a black and white (B/W) edit of the original color photo, it puts more focus on the emotion of the moment between these hunters. Also, by creating a B/W edit, you essentially hide any visible blood from an otherwise great photo. (Tom Ryle/WDFW)
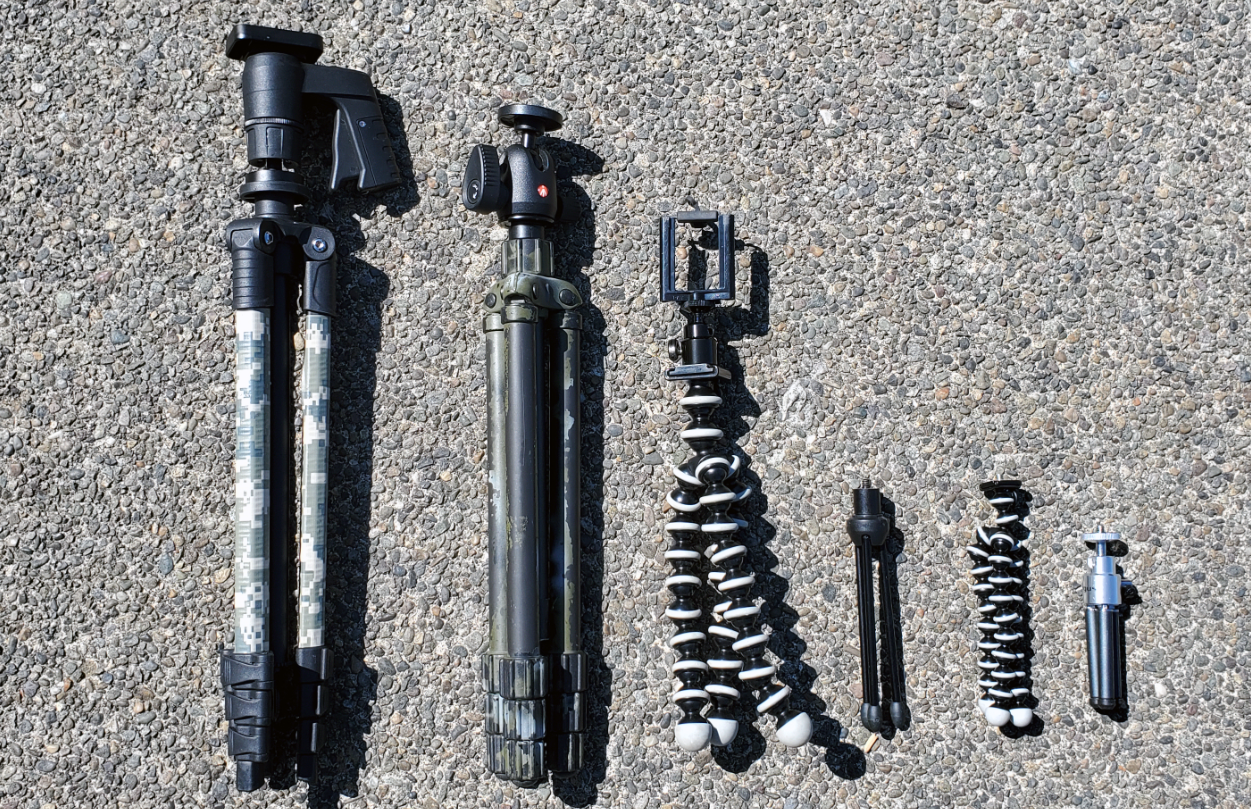
There is a wide variety of tripods to choose from and it’s important to match your selection with the camera size & weight you’ll be using. I prefer the lightweight, flexible model for my cellphone and small point and shoot camera. Note the cellphone holder on the flexible tripod at center. (Tom Ryle/WDFW)

The author filmed his daughter walking out with her first turkey this past spring. While the video wasn’t all that interesting by itself, it allowed the author to pull some interesting still images that would be difficult to pose as static shots. (Tom Ryle/WDFW)
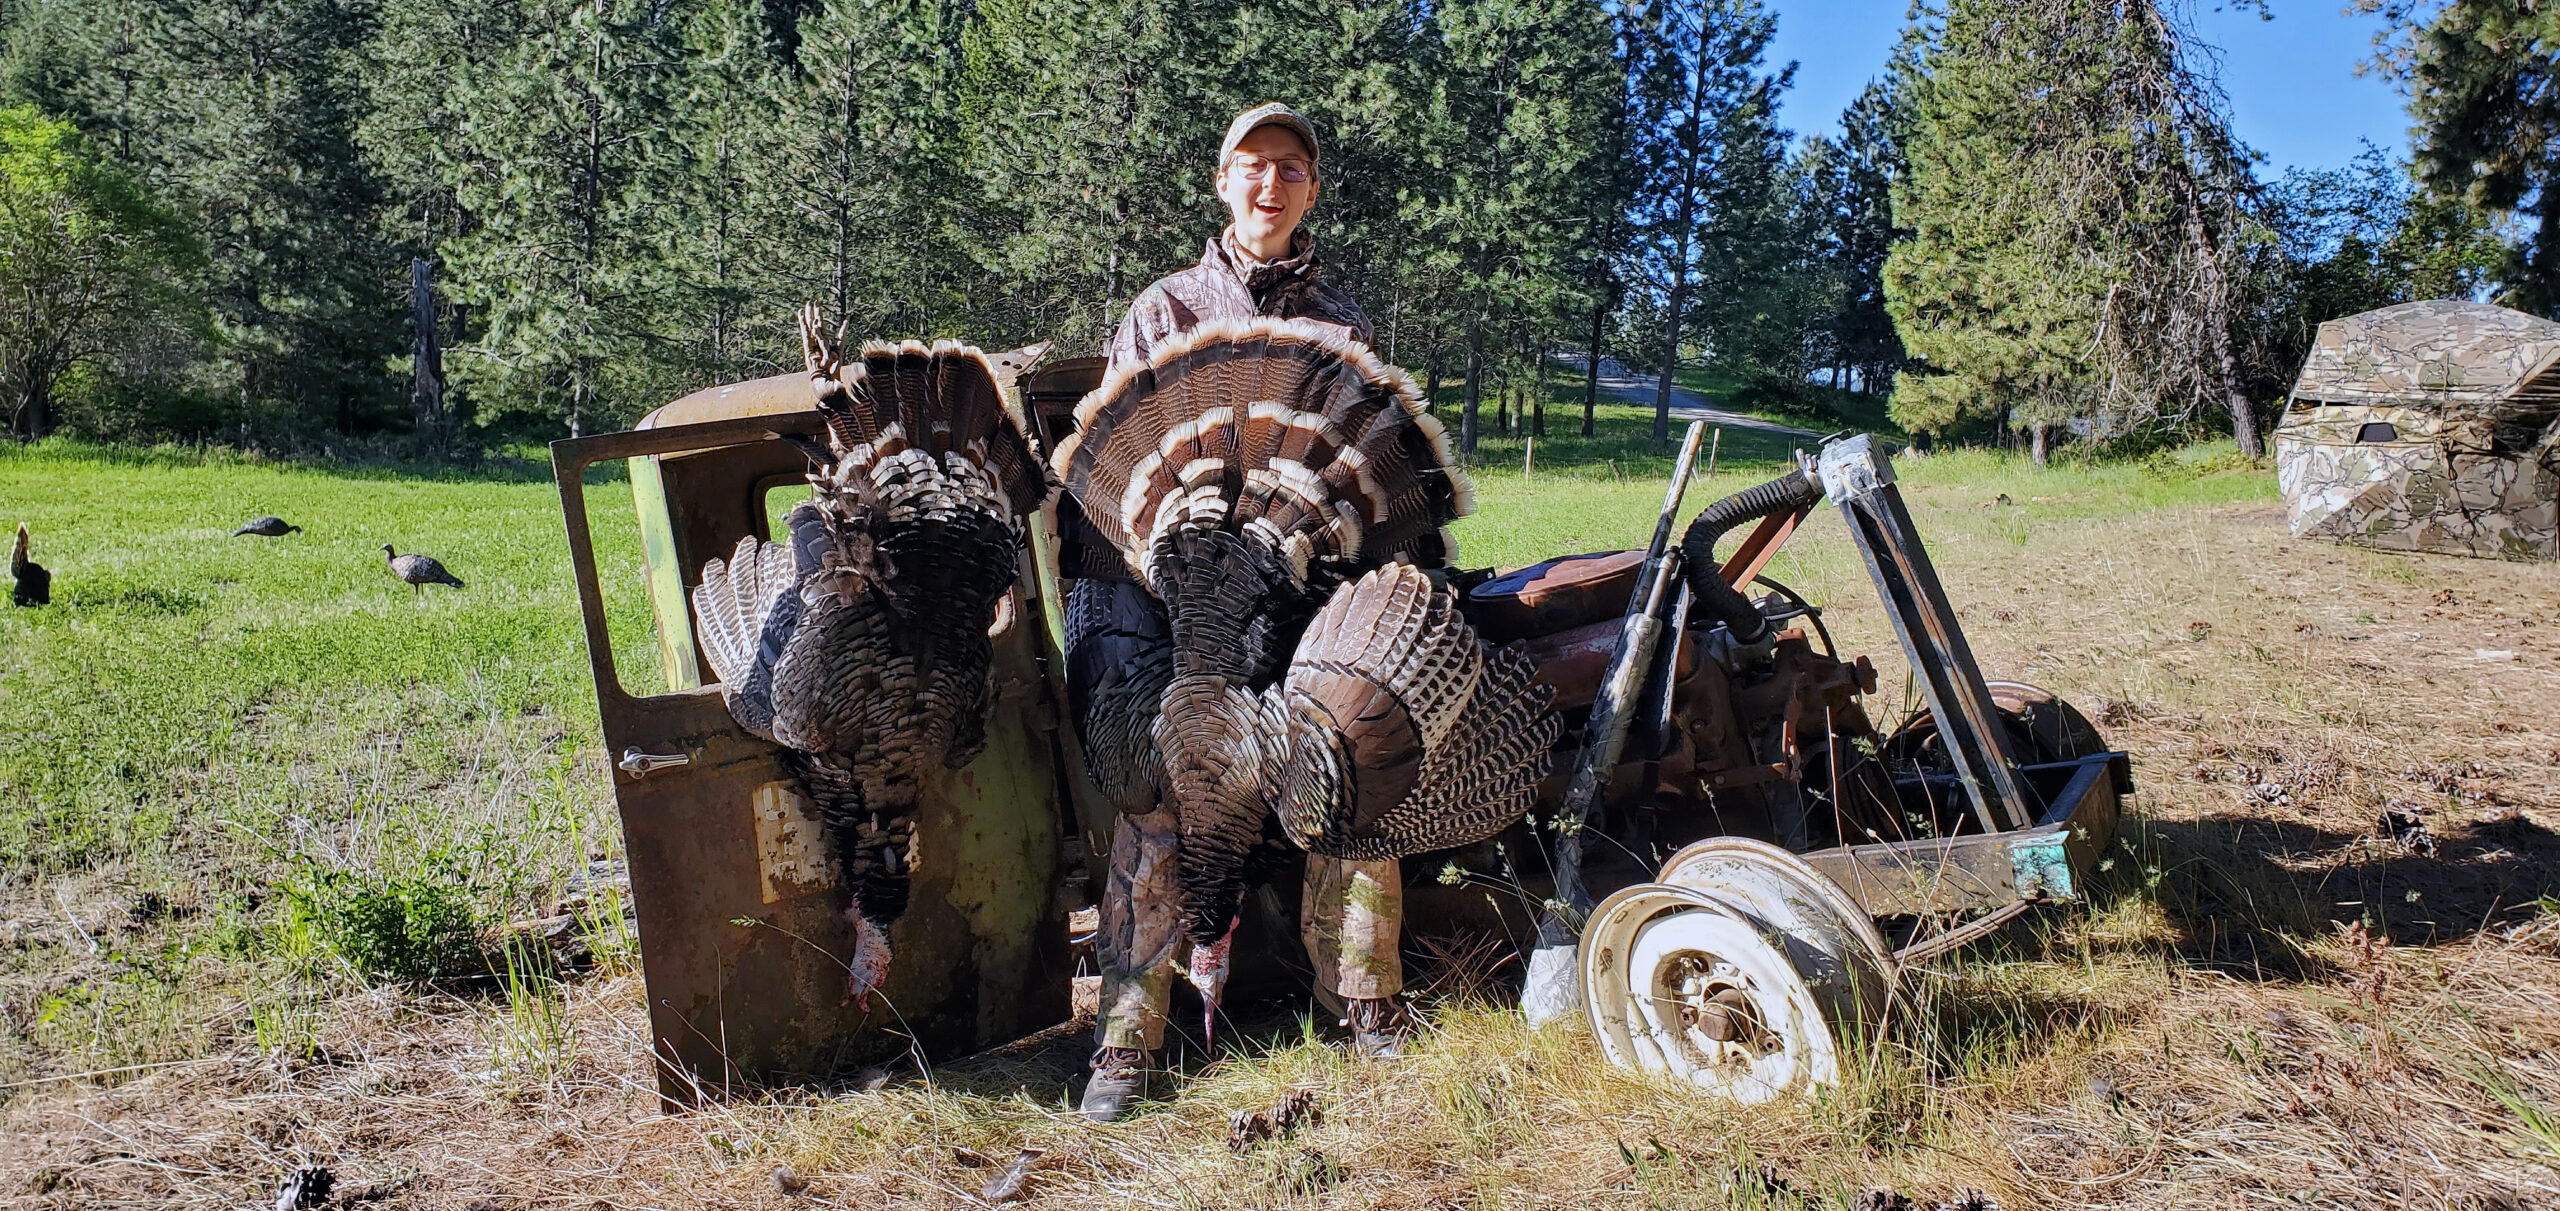
Hunting takes us to some pretty neat places. Don’t hesitate to incorporate some of those elements into your photos. This old farm truck relic provided an interesting photo prop for a successful morning hunt on private land. Also note the blind and decoy setup in the background. Remember, you’re telling a story with your photographs! (Tom Ryle/WDFW)


